
Creating a mosaic is a rewarding way to add a personal touch to your home décor. Whether you’re using old tiles, glass, or even broken dishes, the possibilities are endless. Mosaics are not only beautiful but also a fantastic expression of your creativity.
This type of DIY project doesn’t require professional experience or expensive tools. With a few materials and some patience, anyone can craft a unique piece of art. From small coasters to entire tabletops or wall art, mosaics can transform everyday spaces into vibrant focal points.
If you love hands-on projects and want to personalize your environment with something truly yours, this step-by-step guide is for you. Discover all the materials, techniques, and tips you need to get started today — no artistic background required.
What is mosaic art?
Mosaic art is a decorative technique that involves assembling small pieces of material, such as glass, ceramic, stone, or tile, to form a pattern or image. These pieces, called tesserae, are traditionally arranged on surfaces like tables, mirrors, walls, and even floors. Mosaics date back to ancient civilizations but have remained popular due to their versatility and artistic impact.
For DIYers, mosaics offer a hands-on opportunity to recycle materials, express creativity, and make lasting décor pieces for the home. Whether abstract or figurative, colorful or neutral, the style and scope of a mosaic project are entirely up to you.
Benefits of making mosaics at home
Making mosaics is more than just a craft — it’s a way to personalize your space and enjoy a therapeutic, fulfilling process. Here are a few benefits:
- Creative expression: Design something unique using your favorite colors and patterns
- Sustainability: Reuse old tiles, broken crockery, or recycled materials
- Stress relief: The repetitive nature of placing tiles can be relaxing
- Custom décor: Match your mosaic to the style of your home
Materials you’ll need to get started
Before diving into your mosaic project, it’s important to gather all the essential materials. The good news is, most of these are affordable and easy to find in local craft stores or online. Here’s a basic list:
- Tiles, glass, broken dishes, or any small objects you want to use
- Mosaic nippers or tile cutters (optional but helpful for shaping)
- Adhesive (like tile glue or craft adhesive depending on surface)
- Grout (pre-mixed or powder to mix yourself)
- A base surface (tray, wood panel, tabletop, flowerpot, etc.)
- Spatula or spreader for grout
- Safety goggles and gloves
- Sponge and cloth for cleaning excess grout
- Pencil and ruler (for planning your design)
Once you have your tools and materials ready, you’re all set to begin crafting.
Choose your surface and plan your design
Start by selecting the object or area you want to decorate. Beginners often prefer flat, small surfaces like coasters, trivets, or trays. As you gain confidence, you can move on to more ambitious surfaces like tabletops, garden stones, or wall murals.
Use a pencil to lightly sketch your design directly onto the surface. Alternatively, you can draw it on paper first and transfer it. Planning your layout beforehand helps avoid gaps and allows you to test your composition before gluing anything down.
Think about color combinations, shapes, and the final look you want to achieve. You can go abstract or figurative — there’s no wrong choice.
Cut and arrange the mosaic pieces
Once your design is outlined, it’s time to prepare your tesserae — the small pieces that make up the mosaic. If you’re using tiles or glass, you can break them gently with a hammer inside a cloth or use mosaic nippers for more precise shapes.
Arrange the pieces over your sketch without glue to ensure they fit your layout. This “dry fitting” step is crucial, especially for beginners. It allows you to adjust placements, create more balance, and ensure no two pieces are too close or leave large gaps.
When satisfied with the arrangement, take a photo for reference — it’s useful when gluing.
Glue the pieces to the surface
With your design dry-fitted and ready, begin gluing each piece one by one. Apply a small amount of adhesive to the back of each tile or directly on the base. Press firmly, but avoid pushing glue to the sides.
Work in small sections, taking your time to align the pieces with your design. Leave small, even spaces between each tessera (about 1/8 inch or 3 mm) to make room for the grout.
Let the glue dry completely — usually 24 hours, depending on the product used. Check the instructions on your adhesive for exact drying time.
Apply the grout carefully
After the glue has fully dried, it’s time to fill the gaps with grout. This step brings your mosaic together, giving it a clean and polished finish.
Use a spatula or your fingers (wearing gloves) to spread grout over the entire surface, pressing it into the spaces between the tiles. Make sure all gaps are filled completely. Don’t worry if the mosaic looks messy — that’s normal at this stage.
Wait about 10 to 20 minutes, then gently wipe off the excess grout from the tiles with a damp sponge. Rinse the sponge often and be careful not to remove grout from between the pieces.
Let the grout dry for at least 24 hours.
Polish and seal your mosaic
Once the grout is fully dry, your mosaic may appear dusty or cloudy. Use a clean, soft cloth to buff the surface and remove any residue, revealing the true colors of your materials.
If your mosaic will be exposed to moisture (e.g., outdoors or in the kitchen), it’s recommended to seal it with a mosaic or grout sealer. This step protects your work from water damage and stains, extending its durability.
Sealing is usually done with a brush or sponge. Follow the product instructions carefully and allow it to dry fully before using the piece.
Project ideas to inspire your creativity
Now that you know how to make a mosaic, you can explore different types of home décor projects. Here are some beginner-friendly ideas:
- Mosaic coasters – use small wooden bases or cork rounds
- Wall art panels – create geometric or floral designs on framed boards
- Flowerpots and planters – decorate ceramic pots for balconies or gardens
- Picture frames – add mosaic borders to give them a unique touch
- Tray or tabletop – personalize serving trays or side tables with bold patterns
- Mirror frames – add a reflective twist with glass mosaics
Start simple, and as your confidence grows, experiment with larger pieces and intricate designs.
Tips for a successful mosaic project
To ensure your mosaic turns out great, keep these practical tips in mind:
- Always wear safety goggles when cutting glass or tiles
- Use contrasting grout to make your design stand out — or matching grout for a subtle look
- Don’t rush the gluing or grouting process
- Clean your tools immediately after use to prevent damage
- Practice on scrap surfaces before starting your main project
Remember, perfection isn’t the goal — uniqueness is. Small imperfections add character and make each mosaic truly one of a kind.
How to involve kids or friends in the process
Mosaic making can be a fun group activity. If you want to involve your kids, choose safe materials like smooth tiles or colored plastic pieces and non-toxic glue. Let them design their own small project like a fridge magnet or name plate.
For a social activity, host a DIY mosaic night with friends. Provide all materials, set up a workspace, and enjoy a relaxing, creative evening. It’s a great way to connect, de-stress, and walk away with a handmade memory.
Common mistakes to avoid
Even simple mosaic projects can go wrong if you’re not careful. Watch out for these common beginner mistakes:
- Skipping the dry fitting – leads to poor layout and spacing
- Using too much glue – causes messy edges and oozing
- Not letting glue dry fully before grouting – makes tiles shift or pop off
- Wiping grout too soon – pulls grout out of the gaps
- Forgetting to seal outdoor projects – can lead to cracking or mold
Each mistake is a chance to learn — don’t let it discourage you. With practice, your skills will improve quickly.
Where to find mosaic supplies in the US
If you’re wondering where to buy your mosaic materials, here are a few reliable options across the US:
- Michaels – offers kits, tools, and beginner-friendly supplies
- Joann Fabric and Craft – great for adhesives and decorative tiles
- Home Depot / Lowe’s – good for bulk tiles and cutting tools
- Amazon – wide variety of styles and mosaic kits
- Local art stores or recycling centers – great for unique or discounted materials
You can also collect broken ceramics, mirrors, or old jewelry to add a personal touch to your creations.
Types of materials you can use for your mosaic
One of the most exciting parts of mosaic art is the wide range of materials you can use to create a beautiful composition. While traditional mosaics use ceramic tiles or glass, DIY artists have expanded this practice with creative alternatives.
Here are some options:
- Ceramic tiles: Durable and available in many colors and finishes. Great for beginners.
- Glass tiles: Often used for their vibrant, translucent look. Require care when cutting.
- Mirror pieces: Add a reflective, elegant touch — especially great for modern or glam décor.
- Broken dishes (pique assiette): Offers a vintage, eclectic look using old crockery.
- Pebbles and stones: Ideal for garden mosaics or rustic indoor settings.
- Beads and gems: Add sparkle and texture to small craft projects.
- Recycled materials: Bottle caps, buttons, old jewelry, and even CDs can be repurposed.
Use what you already have or mix multiple materials for a layered, eclectic aesthetic.
Comparison of popular mosaic materials
Here’s a table comparing common mosaic materials to help you choose based on your needs and project type:
| Material | Best For | Ease of Use | Durability | Visual Effect | Indoor/Outdoor |
|---|---|---|---|---|---|
| Ceramic Tiles | Beginners, tabletops | Easy | High | Solid, matte or glossy | Both |
| Glass Tiles | Mirrors, wall art | Moderate | Medium-High | Shiny, colorful | Indoor preferred |
| Broken Dishes | Vintage décor, crafts | Easy | Medium | Textured, varied | Indoor |
| Mirror Pieces | Modern projects, frames | Moderate | Medium | Reflective, glam | Indoor |
| Pebbles/Stones | Garden paths, rustic décor | Moderate | Very High | Natural, organic | Outdoor ideal |
| Beads and Gems | Crafts, picture frames | Easy | Low-Medium | Sparkly, detailed | Indoor |
| Recycled Objects | Eco-friendly pieces | Easy | Varies | Creative, unique | Depends on material |
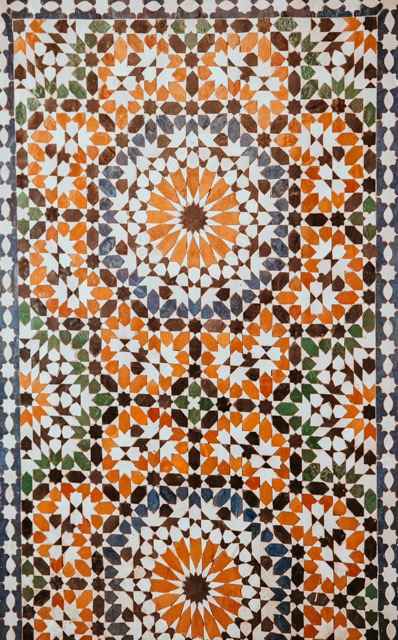
The history and cultural impact of mosaic art
Mosaics have been around for thousands of years, with early examples found in Mesopotamia, Greece, and Rome. Originally used in temples, palaces, and public baths, mosaics became symbols of wealth, spirituality, and artistic sophistication.
Byzantine mosaics, made with glass tesserae and gold leaf, adorned churches and inspired awe. Islamic mosaic patterns later added complex geometric precision. Today, modern mosaic art continues this legacy through both public installations and DIY home projects.
Understanding the cultural depth of mosaics adds richness to your work. You’re not just decorating — you’re participating in a global, timeless art form.
Mosaic styles and patterns to try
When designing your mosaic, consider choosing a style that fits your personal taste and the space it will occupy. Here are some patterns and approaches to inspire your layout:
- Geometric: Squares, triangles, and repeating patterns create clean, modern visuals
- Floral: Great for feminine or natural aesthetics, using soft curves and petal shapes
- Mandala: Symmetrical circular designs, often spiritual or calming
- Abstract: Free-form shapes and colors — no rules, just creativity
- Pictorial: Representing animals, landscapes, or objects in recognizable form
- Text-based: Spell out words or short quotes using contrasting colors
You can mix styles or invent your own. The design is where your personality shines.
How to choose the right color palette
Color selection can make or break a mosaic design. Use the following principles to build your palette:
- Contrast: Dark and light tiles next to each other enhance visibility
- Harmony: Stick to analogous colors (next to each other on the color wheel) for a soothing look
- Accent colors: Use bold colors sparingly to draw attention
- Theme-based: Choose colors based on a theme (ocean, sunset, earth tones)
Test combinations before gluing. Some artists lay out small sections and photograph them to preview the final effect. Don’t be afraid to experiment — mosaics are forgiving.
Outdoor mosaic projects for your garden or patio
If you’re looking to extend your mosaic skills beyond indoor décor, consider these outdoor ideas:
- Stepping stones: Personalize your garden path with colorful tile-covered stones
- Planter boxes: Add a mosaic border to wooden or concrete planters
- Birdbaths: Line the inside or rim with waterproof tiles for a vibrant effect
- Garden benches: Turn plain concrete or wood benches into art pieces
- Walls or fences: Create a mural section that becomes a garden focal point
Use waterproof adhesive and grout, and always seal the final piece to protect against weather.
How to repair or update old mosaic work
If you find a damaged mosaic or want to revamp an old project, you don’t have to start from scratch. Here’s how:
- Clean the surface: Remove dust, debris, and any loose grout
- Replace missing pieces: Cut new tiles to fit and glue them in place
- Regrout: If the old grout is cracked or discolored, remove it carefully and apply a fresh layer
- Polish: Use a soft cloth to bring back the shine
- Seal: Refresh the protective coating for outdoor or high-traffic areas
Mosaics are incredibly durable when maintained, and small repairs can breathe new life into them.
Turning mosaics into a business or side hustle
If you fall in love with making mosaics, you might consider monetizing your hobby. Handmade mosaics can be sold online, at craft fairs, or in local shops. Here’s how to get started:
- Create a portfolio: Photograph your best work
- Offer custom projects: Let customers request names, colors, or themes
- Start a social media page: Share your process and finished pieces to attract followers
- Sell on platforms like Etsy: Offer coasters, frames, and custom décor
- Teach workshops: Host classes in your area or create online courses
Mosaics have niche appeal and high perceived value, especially when they’re handmade and unique.
Organizing your workspace for mosaic making
A clean, organized workspace boosts productivity and makes crafting more enjoyable. Here’s how to set one up:
- Use trays for sorting tiles by color or shape
- Keep tools in reachable containers
- Cover your surface with plastic or newspaper for easy cleanup
- Have a water bowl nearby for rinsing sponges and hands
- Ensure good lighting — natural light is ideal for choosing colors
If space is limited, use stackable storage bins or a rolling cart to keep your materials tidy and mobile.
How to display your mosaic projects at home
After completing your mosaic, showcasing it properly is part of the reward. Here are some display ideas:
- Hang mosaic wall art with sturdy hooks or picture hangers
- Place mosaic trays or coasters on coffee tables and counters
- Use plate stands to display decorative mosaics on shelves
- Mount outdoor pieces on walls or fences with weather-resistant supports
- Build a gallery wall with multiple small mosaics in a themed arrangement
Consider lighting — direct or spotlighting can enhance glass and mirror mosaics. Let your art become part of your daily environment.
Conclusion
Mosaic art is a creative and accessible way to bring beauty, texture, and personality into your home. With just a few materials, a bit of planning, and your imagination, you can transform everyday objects into stunning pieces of décor. Whether you’re a seasoned DIYer or just beginning your journey, making a mosaic is a craft that rewards your time and energy with tangible, lasting results.
So, take the first step. Choose your surface, plan your design, and begin shaping your home with creativity — one tile at a time.
FAQs
What is the easiest surface to start a mosaic on?
Flat wooden boards, trays, or coasters are ideal for beginners because they’re small and easy to work with.
Do I need special tools to make a mosaic?
While basic projects don’t require expensive tools, a tile cutter or mosaic nipper helps when working with hard materials.
Can I use broken dishes or mirrors for mosaics?
Yes! Just be sure to sand any sharp edges and wear protective gloves while handling.
How long does it take to complete a mosaic project?
A small project like a coaster can be done in a day, but larger pieces may take several days due to drying times.
Is mosaic art safe for children?
Yes, if you use child-friendly materials like plastic tiles, large beads, and non-toxic glue. Always supervise young kids during the process.
Writing is my passion. I have been writing stories since I was a little kid, and I am grateful that I can continue to write and help people through my content. With a degree in Marketing, I truly love studying, especially when I can enjoy a good cup of coffee at the same time.